Showing posts with label adhesive. Show all posts

Thursday, April 28, 2016

BFF Thanks

Hi there! Thanks so much for stopping by. Today I have a card with lots of goodies made for a friend who gift ME a Simon says gift card! So, of course I just had to make her a card with the new goodies courtesy of her.


The flowers were heat embossed in gold, then watercolored. The back ground paper is from MME On Trend 2. The "thanks" die is actually from craftin' desert divas, then I heat embossed in the same gold tone as the flowers. Finished the card off by adding gold sequins!

I think the longest part of making this card was to cut the flowers!

I am entering into the following challenges:

http://sharejoychallenge.blogspot.com/2016/04/share-joy-challenge-33-sketch-color.html
Then
Simon Says Anything Goes
http://www.simonsaysstampblog.com/wednesdaychallenge/


and to top this off
Craftin Desert Divas In the Garden Linky Party

Have a blessed day!

Crystal

Saturday, December 12, 2015

Christmas Card

Hi there Country Crafters! Crystal here with a simple and quick card using Graphic 45 Christmas Carol. 

This card features the flowers from one of the journaling cards found behind a12x12 sheet.

To make this start by trimming your paper to 5.25 x 4.25.
Next cut your flowers and add a bit of glossy accents onto the berries. Let dry.
Die cut a light piece of patterened paper. (Included in your 12x12 set)
Stamp your sentiment.
Add your flowers with foam adhesive.

I think this is quite festive card. You can purchase all these products at Country Craft Creations. Click HERE to go to their store.

Thanks so much for stopping by! Have a Blessed Day!

Crystal

Wednesday, November 25, 2015

Foxy Shaker

Hi there! Crystal here from crystalthompson.net with another fall card featuring Echo Park: A Story of Fall. I am all about using what I've got to the max and this collection from Echo Park is so gorgeous! Before I put it away I have one final "fall" theme card.


This card of course is super simple to make!

1. Trim base piece of card stock to 4.25x 5.50 inches and ink around it with an orange ink pad.

2. Trim 2 of the journaling card from the pack and ink those as well.

3. Adhere those journaling cards to the base.

4.  Trim a third piece of card (the fox in this case) and ink around it.

5. Place your inked card in a photo sleeve, add your glitter or sequins and fuse together.

6. Finish your card by adding enamel dots.


Products used for this card:


Echo Park: A Story of Fall 12x12 pages

Echo Park: A Story of Fall Enamel Dots

Carta Bella White Linen card stock

Orange ink


Thanks so much for stopping by and have a blessed Thanksgiving!


Crystal

www.crystalthompson.net

Thursday, November 19, 2015

November Club Q~ Gift giving

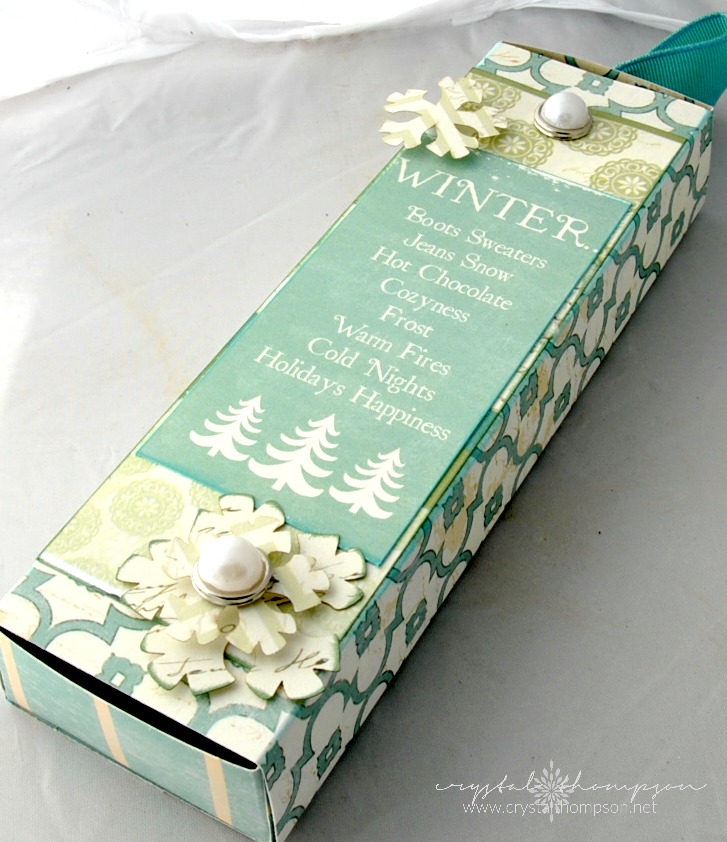
Hello Quick Quote Fans! Crystal here with November Club Q's kit. With the holidays coming up I have made a few little gifts with this months Club Q.

The paper collection in the kit is called "Chiffon", and its perfect for a winter wonderland theme.  First I created a gift box with one of the card making kits.


The gorgeous snow flakes are part of the kit, which makes it super easy to make this box.


to go along with this box I made a pencil case that I will be using for a sweet bracelet I made.


The sentiment is also part of the Club Q kit.

Last but not least, I have card to finish this gift set.


Quick Quotes Products Used:

November Club Q
2015 Seafoam PowderPuff Chalking Inks 
 2015 Sunset PowderPuff Chalking Inks
 2015 Sky Blue PowderPuff Chalking Inks 

The December Kit is now available, however you shouldn't miss out on this AWESOME kit with gorgeous colors!

Crystal 

Tuesday, August 25, 2015

6x6 Page Layout Inspiration

Hello! Crystal here to host the blog. First, thank you for joining us today for some 6x6 page inspiration featuring Catalina Island  Let's get started!


Start by trimming a solid piece of card stock to a 6x6 size. Proceed to cut your patterned paper to 2x6. Select a "rib boning" solid and place in the center between your 6x6 piece and the patterned paper.

Next trim a piece of paper to serve as your mat for your photo. Embellish with papers cut into ribbons and adhere on the back.

Embellish!

Now your 6x6 page is ready for a gorgeous photo.

Quick Quotes Products Used:
Catalina Island 300
Catalina Island 100
Catalina Island Stickers

Thanks so much for joining me today!

Crystal


Friday, August 14, 2015

Chalk Ink Inspiration with Crystal

Hello! Crystal here to host the blog. First, thank you for joining us today for some card inspiration featuring Quick Quotes Chalking Inks. This card was made by stamping lots of gorgeous chalking inks. Let's get started!


First select your "main" color chalking ink. Here I am using Caribbean Blue as my main color and selecting my coordinating card stock.

Then proceed to stamp your shape in different colors.Make sure you allow time to dry between colors/stamping.  Add your sentiment.

I wanted to add wood shapes, so I simply stained them using the chalking inks. Voila! It's done.


Quick Quotes Products Used:
Caribbean Blue PowderPuff Chalking Inks
Blue Jeans PowderPuff Chalking Inks 
Peach Tree PowderPuff Chalking Inks

Other products used:
Wood Veneers
Adhesive 
Light Blue Cardstock 

Thanks so much for stopping by today!
Crystal